INDUSTRY NEWS
Maintenance and Commissioning Guide for Pneumatic Butterfly Valves
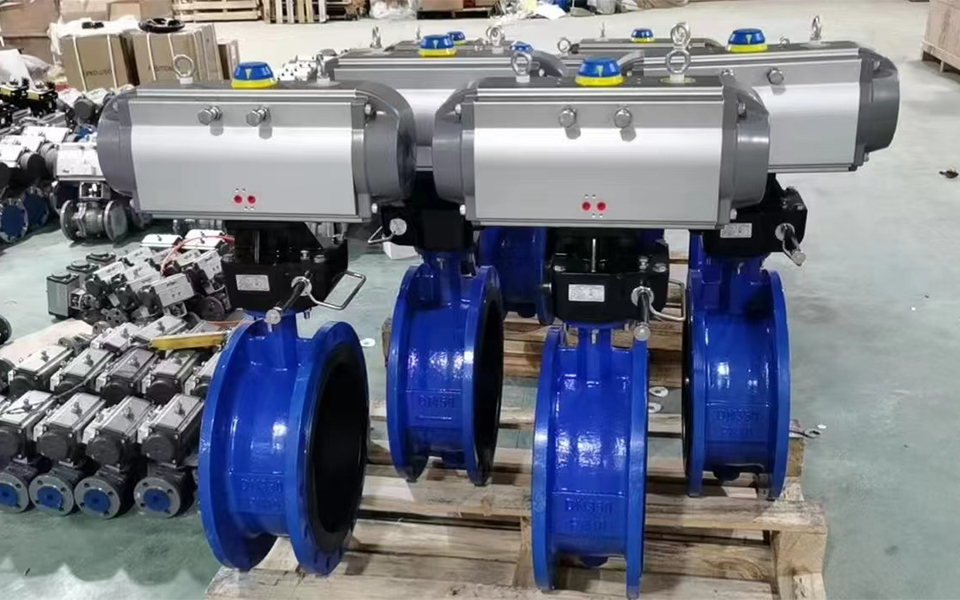
The pneumatic butterfly valve, a product formed by the perfect combination of an air actuator and a butterfly valve, has gained a place in the industrial field with its unique opening and closing method and wide range of applications. Its opening and closing action relies on the circular butterfly plate rotating with the valve stem, which not only enables precise closure of the valve but also can have multiple functions such as regulation or segment valve with regulation based on design requirements. In low-pressure medium-sized and large-diameter pipelines, the application of butterfly valves is increasingly widespread. However, how to ensure its continuous and stable performance has become a common concern for users.
Maintenance Methods for Pneumatic Butterfly Valves
Cylinder Inspection and Maintenance Plan
During daily use, it is necessary to clean the cylinder regularly and provide sufficient lubrication, especially the cleaning and lubrication of the cylinder surface. It is recommended to conduct a comprehensive inspection every 6 months, including opening the cylinder end cover and carefully checking whether there are any debris or moisture accumulation inside the cylinder, as well as evaluating the state of the lubricating grease. If it is found that the lubricating grease is insufficient or has deteriorated and dried, the cylinder should be disassembled immediately for thorough cleaning and re-lubrication.
Valve Body Inspection
Every 6 months, it is necessary to regularly inspect the appearance of the valve body and the installation flange to confirm whether they are in good condition. At the same time, check if there is any leakage at the installation flange. If conditions permit, further check the sealing performance of the valve body to ensure no wear signs and that the valve plate can run flexibly without foreign objects getting stuck.
Through these detailed inspections and maintenance, we can ensure that the pneumatic butterfly valve always remains in the best working condition, providing a strong guarantee for the stable operation of the production process.
Detailed Explanation of Disassembly and Assembly Key Points
Disassembly Steps of the Cylinder Body
When disassembling the cylinder body, the first step is to remove the covers at both ends of the cylinder and carefully remove the piston. During this process, pay attention to the direction of the piston to ensure safe operation, especially noting the direction of the piston rack to avoid errors in installation. Then, use external force to rotate the cylinder shaft clockwise to move the piston to the outermost position and gently push the piston out using air pressure in a slow manner. It is particularly important to be cautious when inflating to avoid the piston suddenly popping out and causing danger. Next, remove the spring clips on the cylinder shaft and then remove the cylinder shaft from the other end.
Lubrication and Precautions for Assembly
After disassembly, the next step is to clean each component and add lubricating grease. The parts that need to be lubricated include the inner wall of the cylinder, the piston seal ring, the rack and back ring plate, as well as the gear shaft and seal ring. After adding the lubricating grease, assemble in the reverse order of disassembly. During this process, ensure that the position of the gear rack is correct, that is, when the valve is in the open state (the piston retracts to the innermost position), the upper slot of the gear shaft should be parallel to the cylinder body; while when the valve is closed (the piston extends to the outermost position), the upper slot of the gear shaft should be perpendicular to the cylinder body. Through these steps, we can ensure that the cylinder body can be smoothly disassembled and assembled, thereby ensuring the stable operation of the pneumatic butterfly valve.
Installation and Commissioning Methods and Precautions
Preparations Before Installation and Commissioning
Before installation and commissioning, first ensure that the valve is in the closed state, that is, rotate the valve shaft clockwise until the valve plate is fully sealed against the valve seat. At the same time, the cylinder should also be in the valve-closing state, that is, the small slot above the cylinder shaft should be perpendicular to the cylinder body. Next, install the cylinder smoothly onto the valve, paying attention to the installation direction should be parallel or perpendicular to the valve body. Before tightening the screws, ensure that the screw holes are aligned. If there is a slight deviation, adjust the position of the cylinder before tightening.
Check of Accessories and Supply Pressure
Ensure that all accessories are complete, such as electromagnetic valves, mufflers, etc. Secondly, the supply pressure should be stable within the range of 0.6MPA ± 0.05MPA. Before operation, be sure to clear the debris inside the valve body. During the first commissioning, manually operate the electromagnetic valve to observe the operation state of the valve.
Adjustment of Muffler during Commissioning
If you notice that the valve moves slowly at the initial opening position but then speeds up later, this usually indicates that the valve is closed too tightly. At this point, when adjusting, be careful not to make the adjustment too small; simply adjust the cylinder stroke appropriately. The method is to simultaneously tighten the stroke adjustment screws at both ends of the cylinder. During the adjustment process, it is necessary to run the valve to the open position and then turn off the air source to ensure safety. Additionally, if the muffler is of the adjustable type, the opening and closing speed of the valve can be controlled by adjusting the muffler, thereby ensuring the stable operation of the pneumatic butterfly valve.
![]() +86 15122654356
+86 15122654356
![]() +86 15122654356
+86 15122654356
![]() sale2@tjlituo.com
sale2@tjlituo.com
![]() Xiaozhan Industrial Area, Xiaozhan Town, Jinnan District ,Tianjin , China
Xiaozhan Industrial Area, Xiaozhan Town, Jinnan District ,Tianjin , China